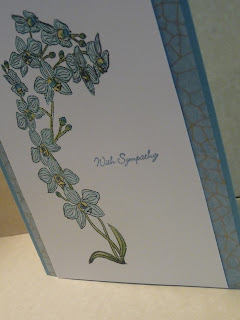
I received these lovely flowers in a swap. I used my Stampin'Up subtle markers to color them and attached them to a matching card stock color. It needed a bit more so I added gold cracked washi tape. Love it.
Sunday, August 28, 2016
Friday, August 12, 2016
Fun Film Thank You Card
This is a fun card that I made with a film strip die cut I received in a swap. The 3 is a die I have as is that thank you stamp. I looked up up the circles to make sure I made them right. I had to free hand them since I didn't have anything that I could trace that was the right size.
Love it!
Wednesday, August 3, 2016
For Your Country on Night of Navy
This card is 5 12 x 4 1/4 stamped in Stampin'Up! Night of Navy on Whisper White card stock. Stamps used are World Map and For Your Country with a Night of Navy card stock strip to accent.
I made this for a friend when her son finished Marine Corps boot camp.
Monday, August 1, 2016
How To Make a Panel Pop Up Card
You will need two pieces of card stock measured 11x 8 1/2.
The first piece cut down to 11 x 4 1/4. Fold one half in half for the cover. The other half cut it to
11 x 2 3/4 then score at 2 3/4, 5 1/2, 8 1/4 and fold into mountains. Set them a side.
One the second piece of card stock make to 11 inch side and mark at 4 1/4, 5 1/2, 6 3/4 and draw lines across the page.
Turn over to the 8 1/2 inch side and mark at 2 1/8, 4 1/4, 6 3/8 and draw lines across the page.
This is what your lines should look like. (It will be the inside of the card.) If you want it to be slightly smaller than the cover make to the inside of your drawn lines another 1/8 inch including the edges. Cut off the corners following the set of lines you plan to use. If you don't make it a bit smaller this piece will fit exactly to the cover.
Fold down the center lines up and down and across.
This is the tricky part. You will have to fold the center line of the right edge down to the center line of the bottom area. Unfold it and repeat with the left side.
You should end up with an X like this with the centers of all your folds meeting in the middle. It will also look like two arrows pointing at each other.
You will now fold the center line of the "arms" into mountains (up) but the point lines will be down (valleys).
This is what it will look like. Lay it flat while folded to crease all the folds.
Take the "M" folded piece from earlier and turn it to the right. The M should be facing your right.
Center the M and attach the right arm to the M. Pull the left arm out and attach it to the front of the M.
Take this finished piece and line it up to the crease of the cover and center on one half and attach.
Attach the other half and fold it down flat.
Finished!
A quick video to show how the card ought to open.
Subscribe to:
Comments (Atom)


